Saturday, January 30, 2016

The TED(Ed) Platform - How it Helps me Reset and Re-energize

I can't recall the first TED talk I saw, but I can tell you that ever since then I have spent a lot of time watching and benefiting from TED talks. The devotion TED has placed on spreading ideas has provided me, and others, with inspiration and energy.

Earlier today I was communicating with +Will Gourley, an Ontario educator who also happens to be a TED-Ed Innovative Educator and a TED-Ed Club leader, and I came to the realization that TED is like an 'external battery pack' for me. There are talks I watch over and over again because they energize me, help me reset and default back to the optimistic/positive setting that benefits my family, students, and mental health. The new talks that I am constantly discovering offer me new perspectives and valuable life lessons that I can incorporate into my day to day experiences to make me a better person.

I have been watching TED talks for years and have attended several TEDx events. I have been trying to apply and connect what I learn from my TED experiences to my work as a teacher to benefit my practice and the learning of my students.

When I learned about TED-Ed lessons and TED-Ed Clubs you can imagine how happy I was to see the marriage between TED and education. I'm also a little surprised that it has taken me so long to reflect on this and write about it.

There are so many ideas worth spreading that can benefit educators and students. TED-Ed lessons, Clubs, and the support that is available to teachers - world wide - is definitely beneficial and needed, as it helps facilitate the sharing of ideas that provide learning opportunities that can be hard to come by.

As a TED-Ed Club leader, I get to support students who want to share their big ideas in the form of short TED style talks. I am still new to the process but excited about assisting students in realizing their passions and full potential as they share their ideas and become more comfortable speaking their minds.

The TED(Ed) platform is my external battery pack. Does it do the same for you? Where do you find your inspiration? How do you re-energize? I know that I am not the only one to feel this way about TED and TED-Ed. I would love to hear whether TED has had the same impact on you!

Thursday, January 7, 2016

Virtual Field Trips via the Google Expeditions Pioneer Program

Would you believe me if I told you that in a span of 30-40 minutes I got to go to Rome, London, and the Moon?

Well it's true! Thanks to the Expeditions Pioneer Program (a virtual reality platform built for the classroom), I got to use Virtual Reality technology to visit those three locations. The Expeditions program is currently visiting schools around the world and bringing with them a complete Expeditions kit with everything teachers need to take their students on journeys anywhere. Thanks to +Carlo Fusco, Teacher Librarian at Waterloo Collegiate Institute, I got to check Expeditions out. I had the opportunity to watch teachers and students use it and and got to try it out myself. The Expeditions Program worked with teachers and content partners from around the world to create more than 100 journeys to make it easy to immerse students in new experiences.


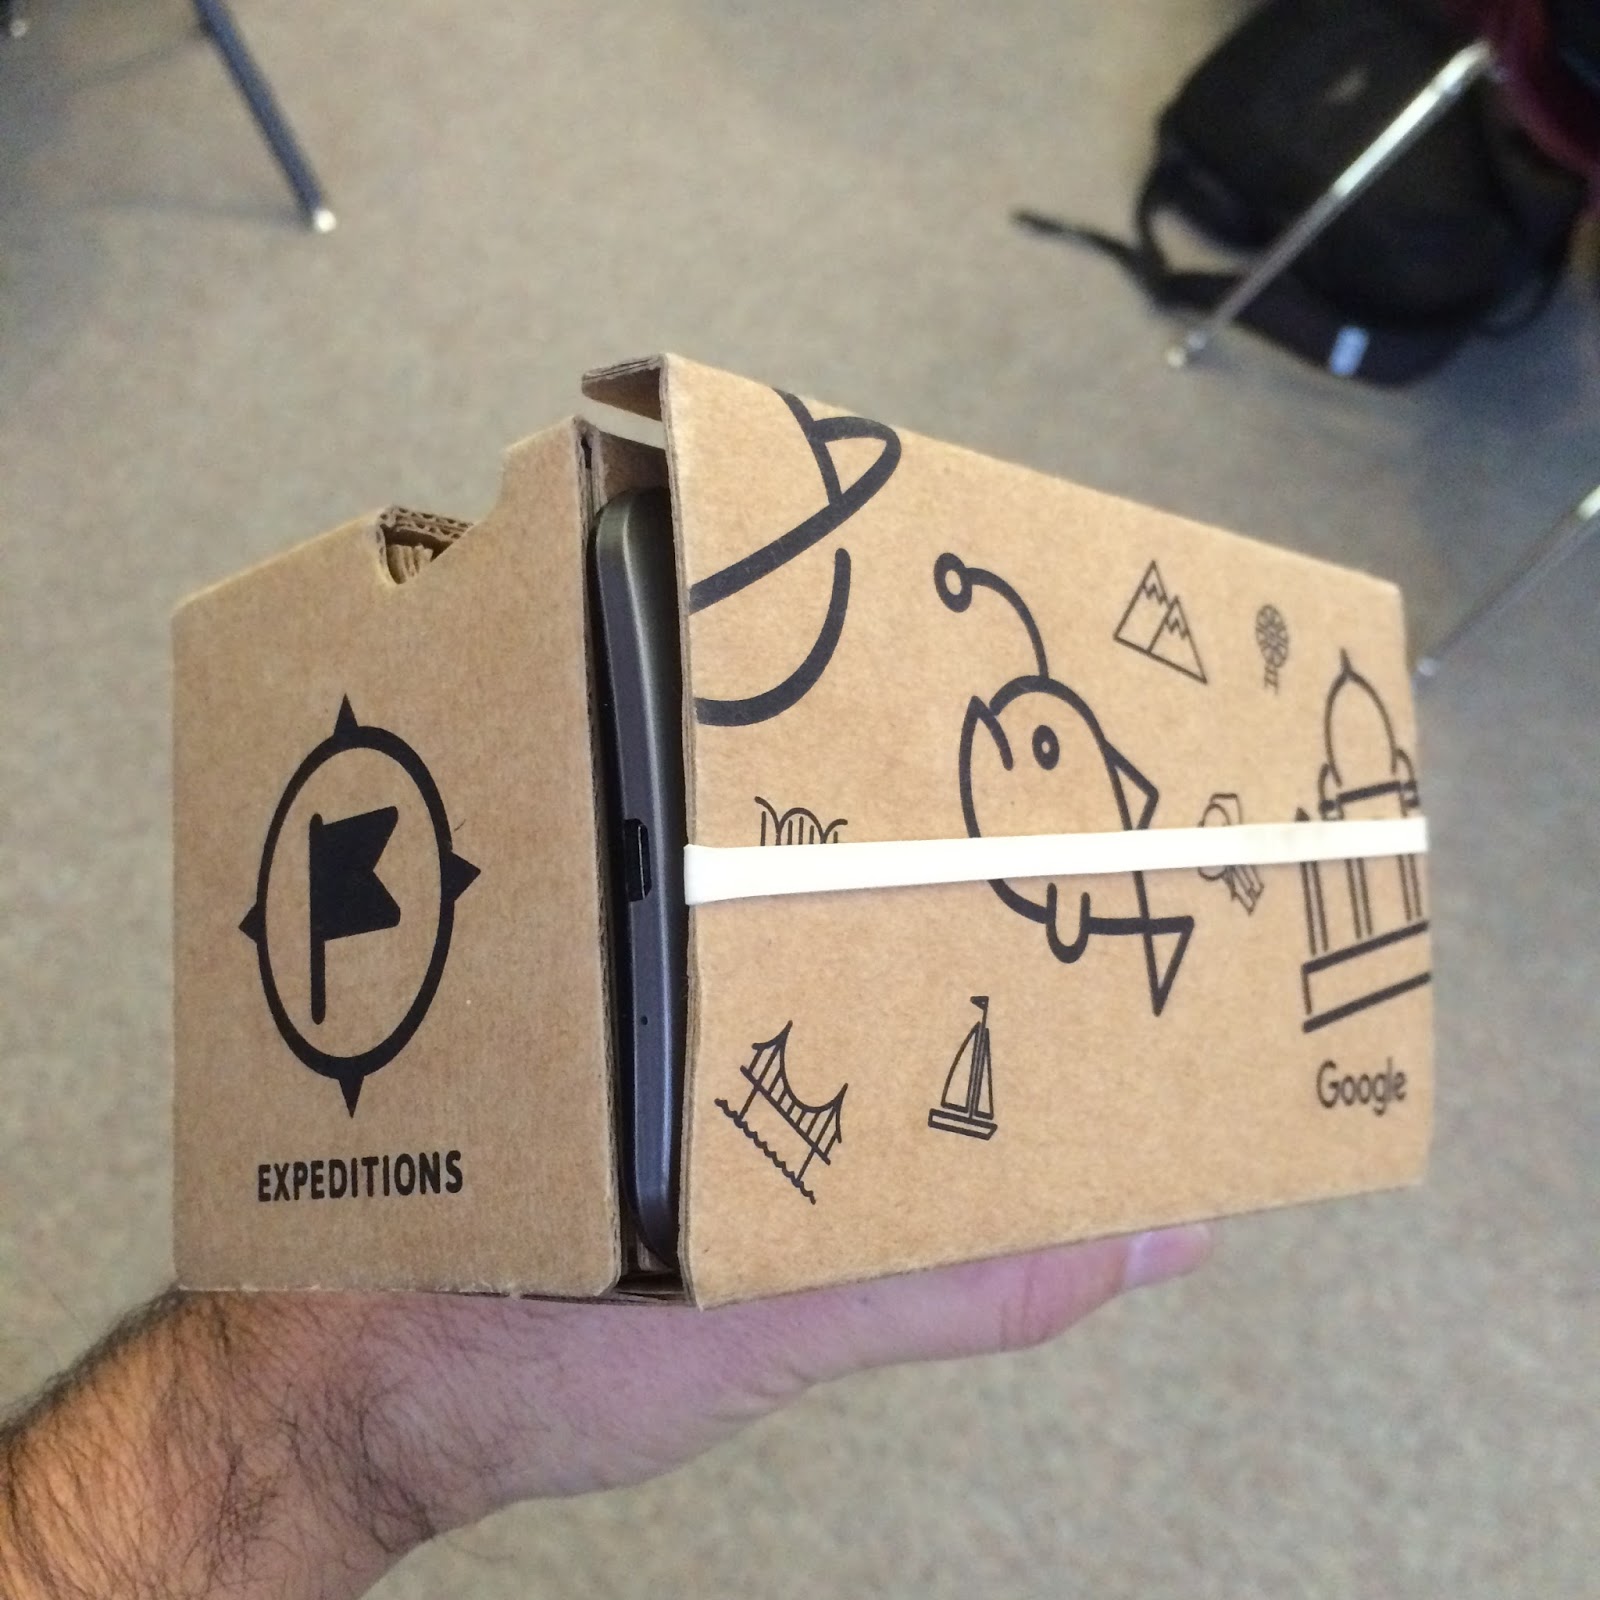
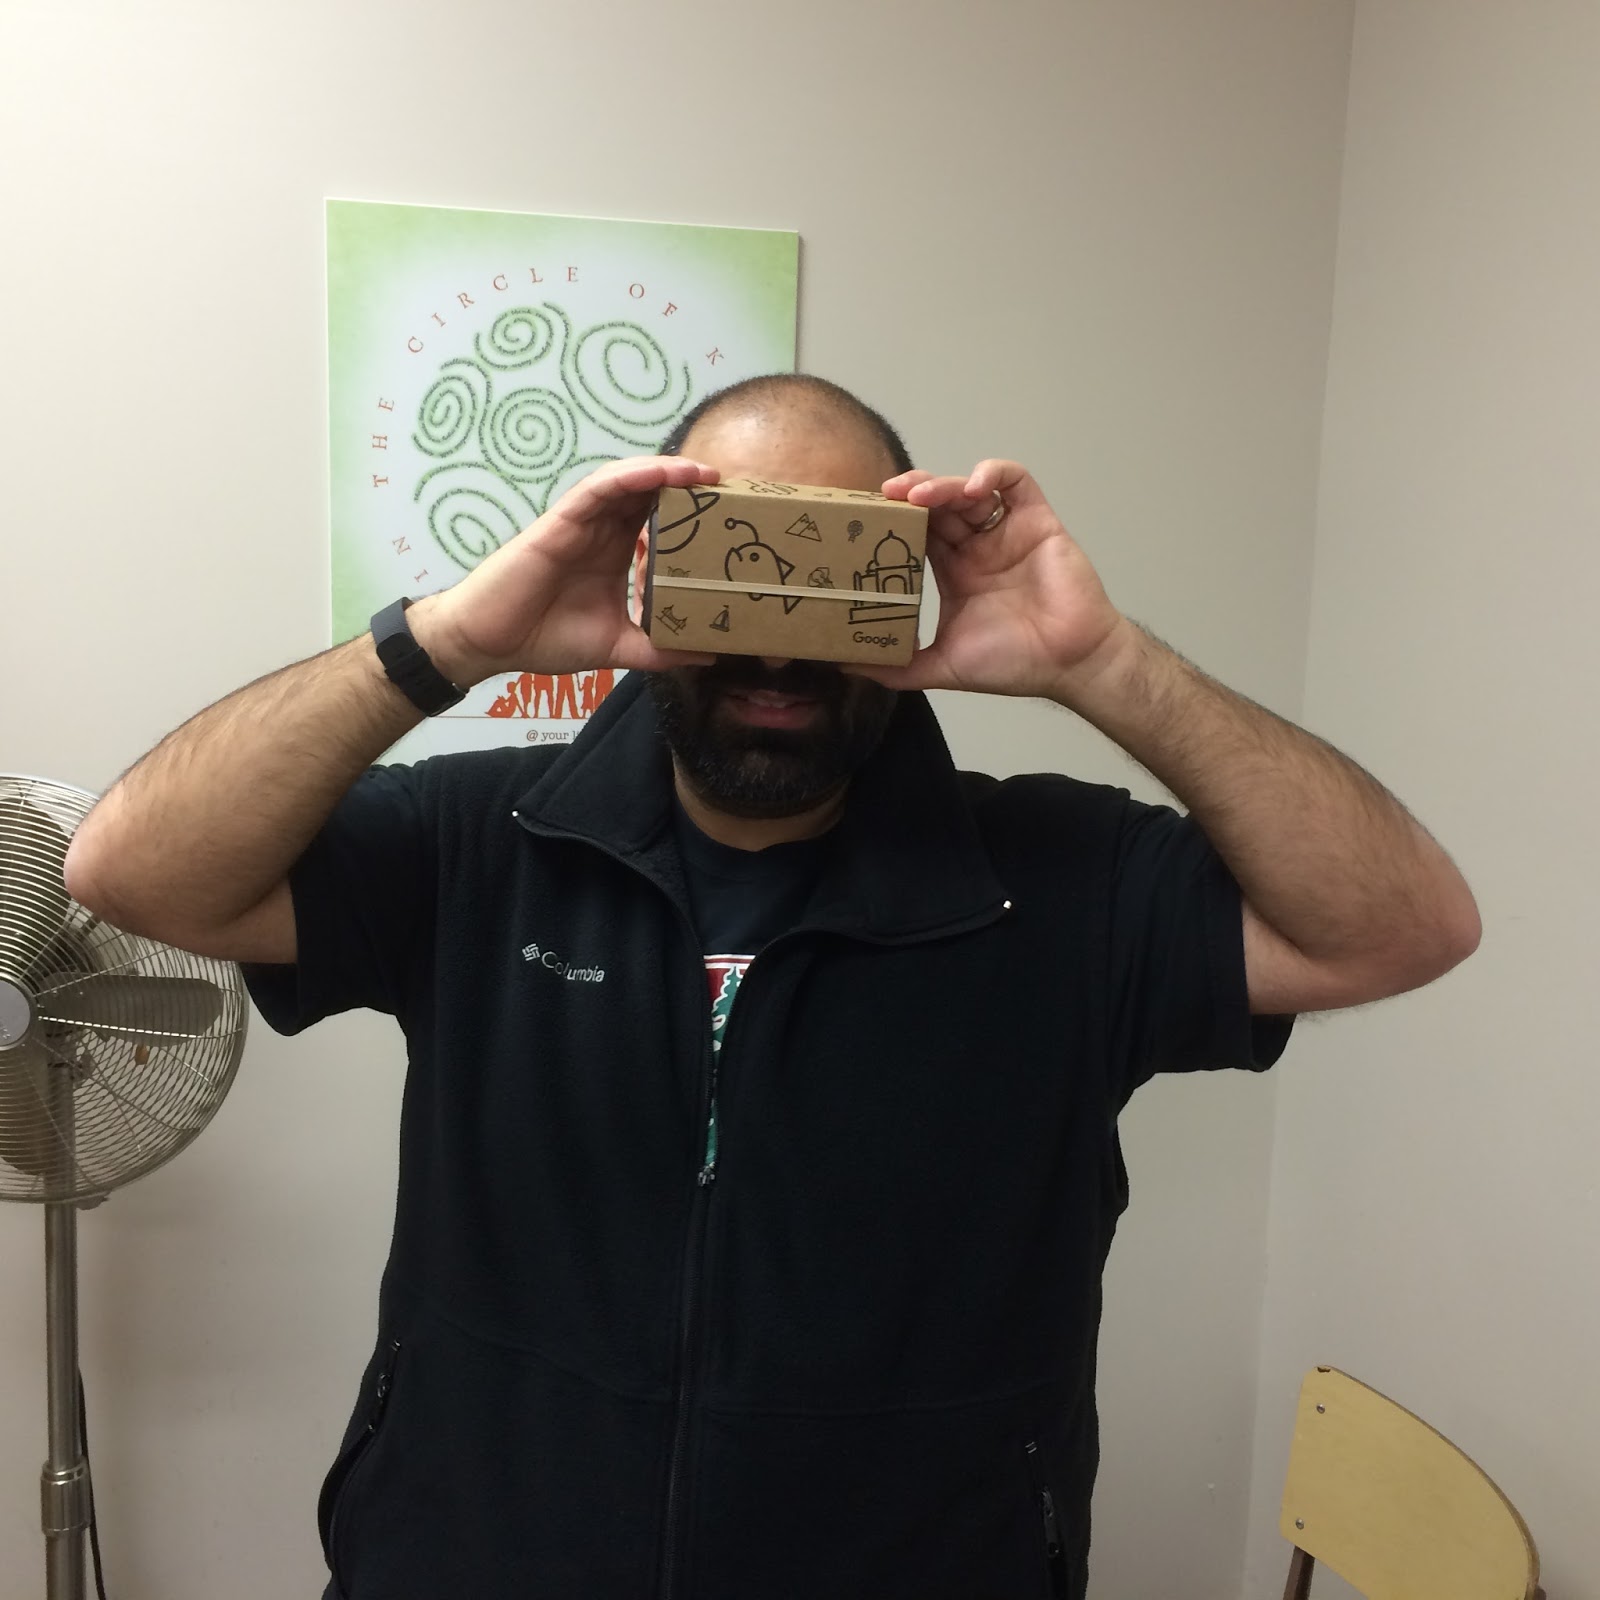
Using a Google Cardboard viewer, a mobile device, and the Expeditions app, I got to go on a field trip with the students who were part of the class. Here are some photos of the cardboard viewer with the mobile device placed in it:


The teacher/leader has a tablet that acts as the 'control' for the trip. On the tablet, the teacher can control the specific destination, can see what the students are looking at, and has access to information about the particular area that is being viewed in order to provide valuable information about the location.

When I visited the moon, I had free reign to look at what I wanted to see (360 degree view). When the teacher wanted me to look at something in particular, an arrow would appear on my screen to tell me what direction to move to in order to see what the teacher would be talking about. The teacher's tablet (the brains of the operation) acts as a lesson plan of sorts and it is connected to all the viewers.

Aside from enjoying the virtual reality experience of going somewhere I had never been before, it was a lot of fun watching the students as they held the viewer to their face and moved around in circles looking up and down.

(Click here for a blog post by +Sylvia Duckworth on Google Expeditions and here for a post by +Holly Clark)

Here is some footage (not that good but I did my best!) that I got with my smart phone of what you view when you move around:

London, England. Going towards the Ferris Wheel.


I don't remember the location, but I think we are getting ready to go up in a Balloon.

This was a really neat experience. I'm excited about the potential and look forward to seeing what happens next with Expeditions and its program.


Bringing Ideas to Life: Using 3D Technology and a Design Mindset - Project Update

With the new year under way I wanted to take some time to reflect on the last 4 months and report on the progress and setbacks of our journey to bring our thinking to life. My last post, wishing everyone a Merry 3D Christmas, was our end to 2015 and it was a great way to wrap up the year. I won't talk too much about it because it is a recent post but it was a great culminating activity to end 2015. I had to sit on my hands to not post it sooner than Dec 24 :)

In Science we had gone on a field trip to the Laurel Creek Conservation Area where we explored animal habitats. One of the activities the students participated in involved learning about animal skulls and teeth and how those characteristics help the animals survive. Many of the students started thinking about the knowledge they had gained and how they could apply what they learned in order to create their own animal skull. They talked about their ideas feverishly and wanted to start getting their ideas out of their heads and into Tinkercad to make their thoughts come to life. It was great to hear the students talk about their ideas and how they were connected to what they learned on the trip. Some of them planned out their thinking and what they wanted to do and other students just started creating and then demonstrated their understanding based on what they had learned. They all had the same goal but didn't all go about getting there the same way. As they worked on creating an artifact of their learning I questioned them, provided them with feedback, and explored their wonders with them.

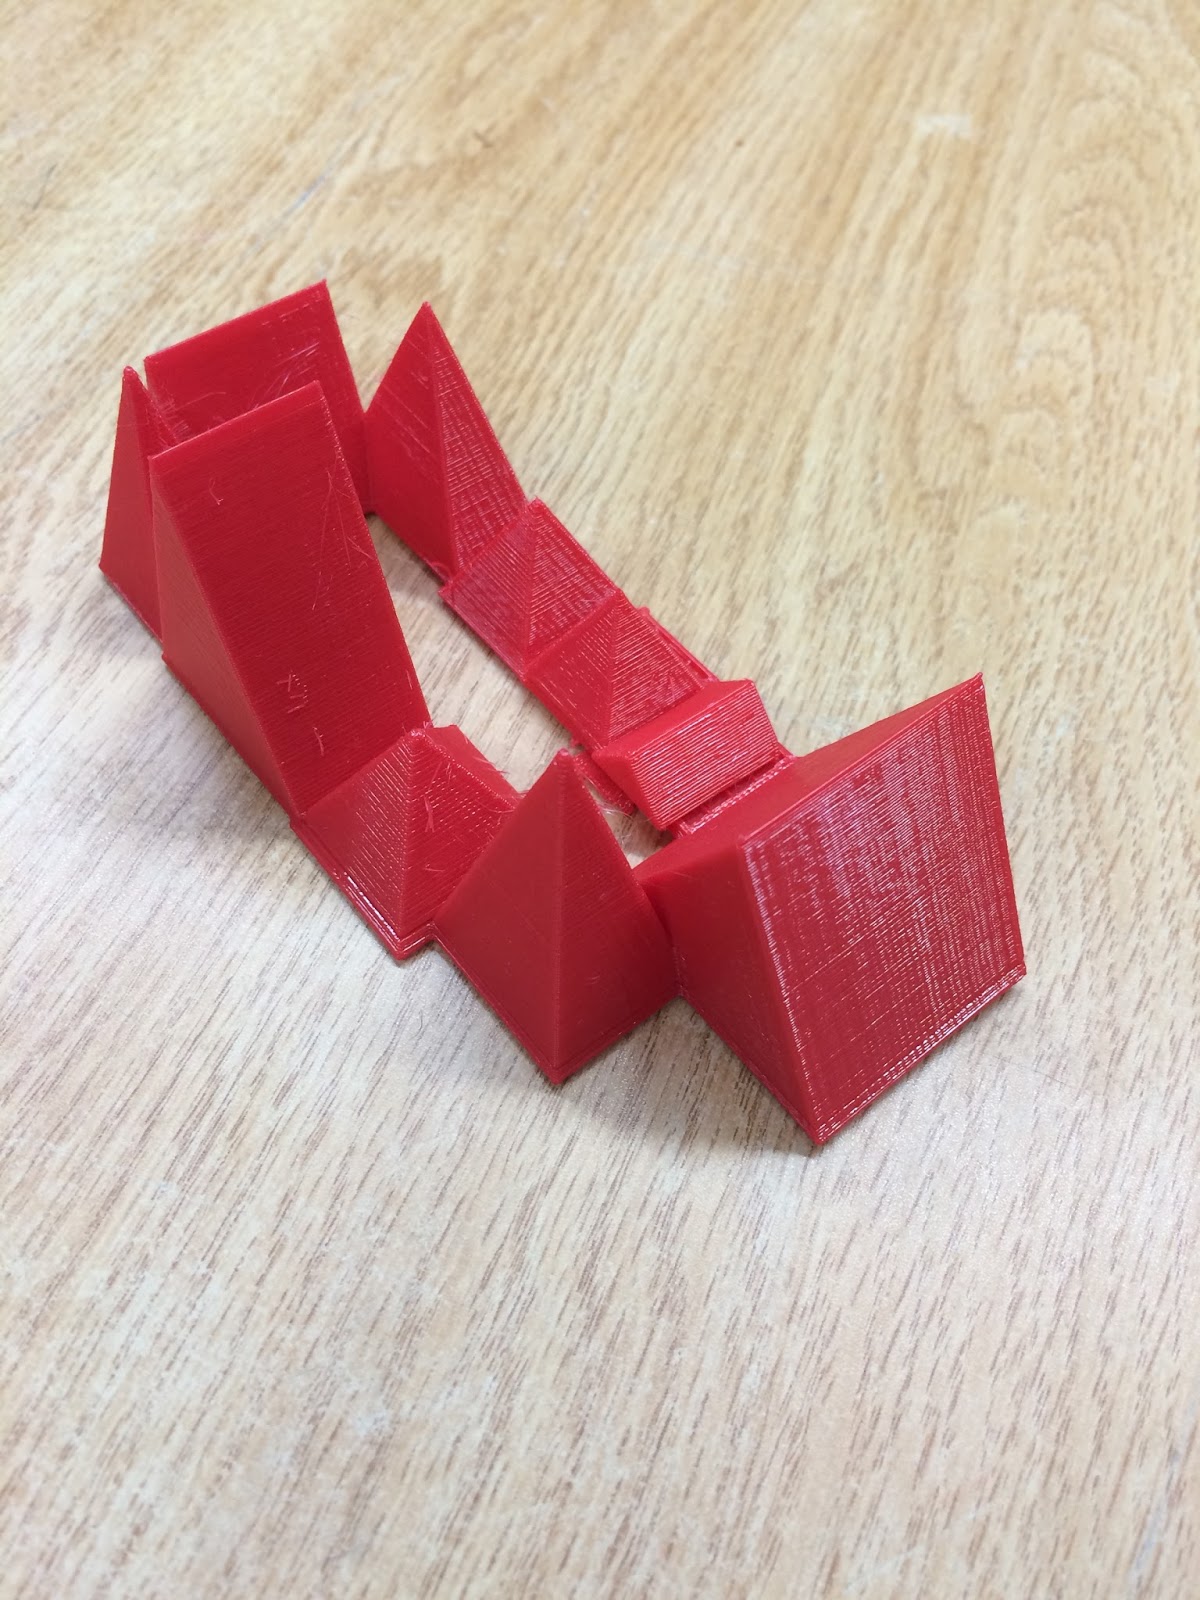
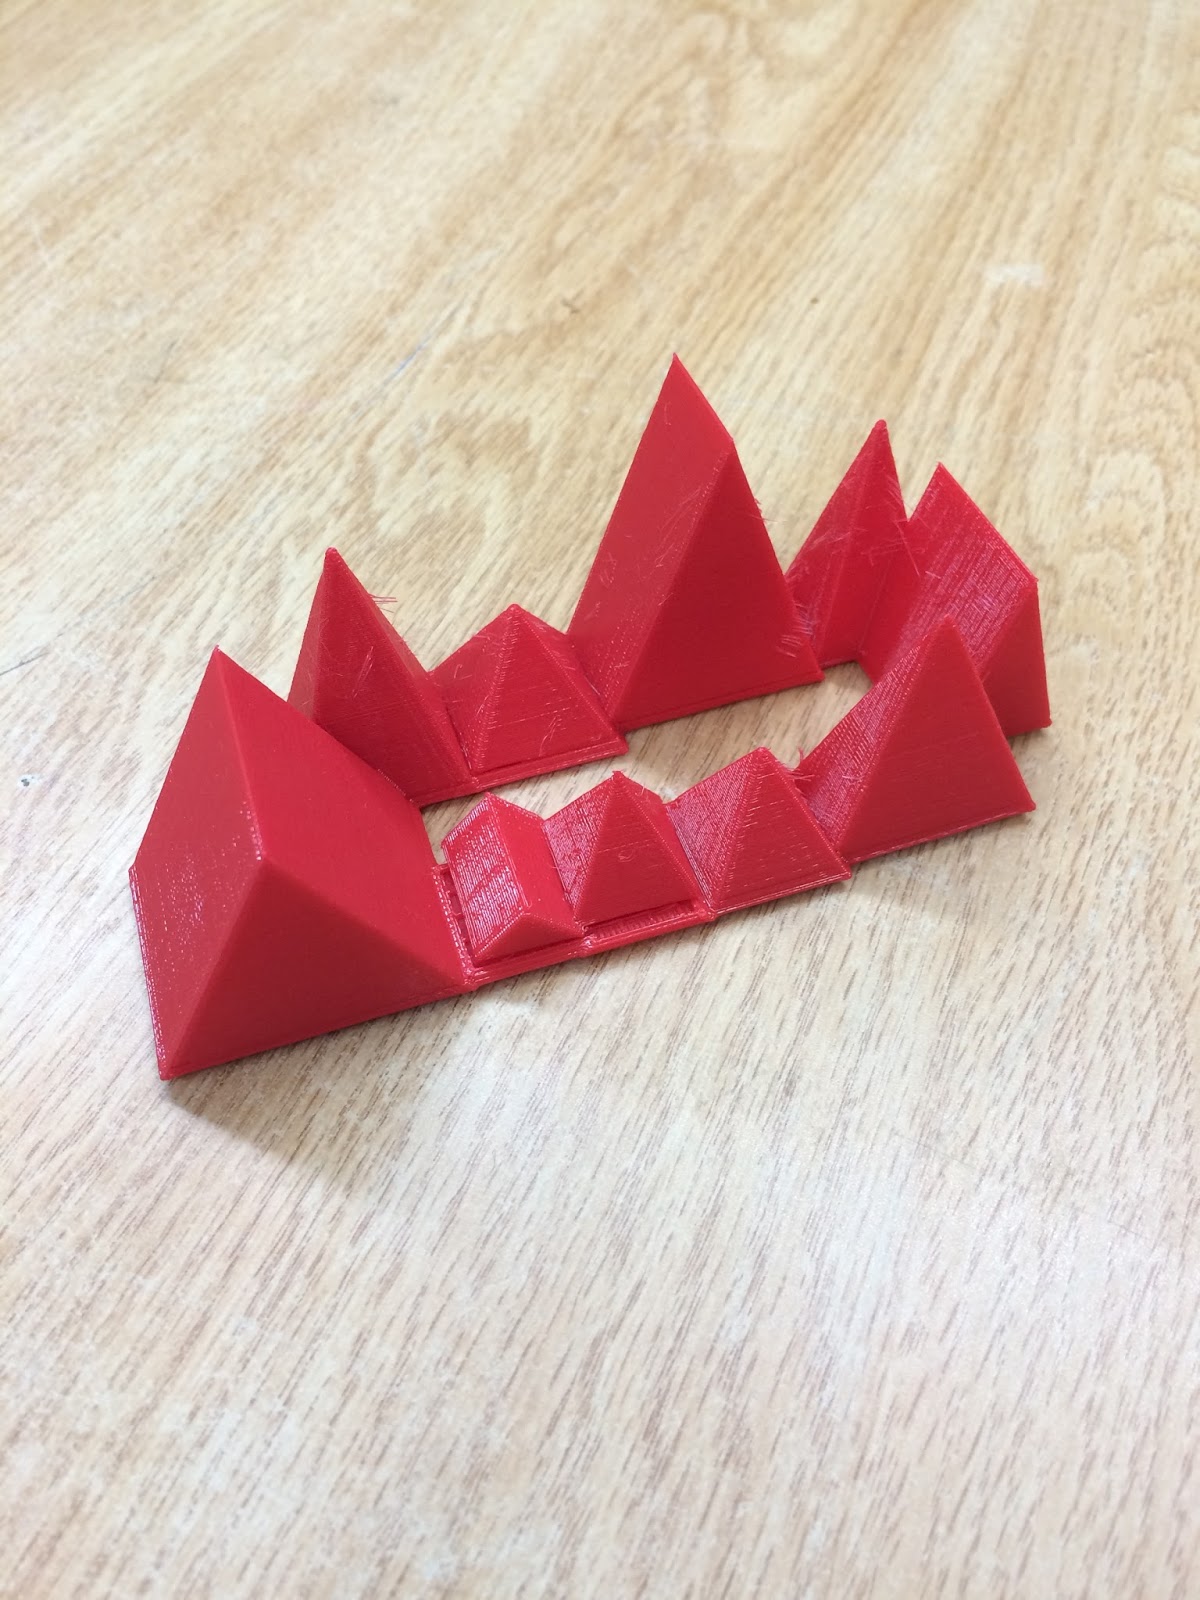
Here are some photos of one of the skulls that were printed:


As you can see, the student had some issues with the top teeth of his skull. This led to questions about how to design in a way that would avoid this. One student suggested designing the top and bottom of the skull separately and then putting them together after printing. Another student suggested having more of a closed mouth where top teeth and bottom teeth could overlap in ways that would allow the printer to do its job but not ruin the aesthetics of the artifact. Lots of great discussion and new learning, both of which are a teachers dream!

We used social media to tweet the Conservation Area about the skull that was created and they asked if they could have a photo. This is what we sent them:


We tried printing other skulls but had some difficulty. Students hadn't corrected the issue with the top teeth so the printer wasn't able to create an artifact that was recognizable. This also led to many printer jams and a lot of wasted time. The designs would take close to two hours to print and we tried not to print anything when we weren't in the classroom. This didn't leave us with as much time as we thought we had! Needless to say, time is a big factor and is needed when printing our work. This new learning came in handy when we designed and printed our Christmas tree ornament and allowed us to create what we had envisioned and then shrink our artifact to a reasonable size that would reduce print time. It was one of our finest hours.

In Social Studies we were learning about Political and Physical Regions of Canada. As we discovered and talked about the various physical regions the students thought it would be cool if they designed their own - based on the information they got from me and their own research (mostly web based). They were fascinated by the Western Cordillera and started expressing THEIR thoughts and ideas. Again, this was wonderful for me to see and hear. Students got themselves together into groups and used their talents and gifts to work together towards a goal that they had established. Here are some samples of their work:


Lots of great conversation/discussion before the printing and lots more after the printing. The students treat their creations like they are valuable minerals. I shouldn't joke too much because to them, these creations mean a lot. They truly are artifacts of their learning - that what they were interested in, thought about, and talked about could be brought to life using the right tools to make it happen. 

What I haven't mentioned in this post yet is all the talk I hear when students are working on designing their creations. They talk about measurement, proportion, grid location, shape, spatial orientation, and design, to name a few. They are taking what they know (and what they don't know) and converging all of it into a focused beam of energy to make their ideas a reality. 

Before the Science and Social Studies, we had some fun with our learning in Mathematics. You can read more about that experience here. The students did some amazing work around creating representations of 4 digit numbers. It was a success in so many ways - design and printing.


And then there was our very first venture - learning to use Tinkercad. We were talking about Rocks and Minerals in Science and the task was to create your very own Mineral!! A fun activity that would allow the students to demonstrate their learning. This proved to be a bit much for all of us. We ended up retreating and used Google Drawing to help us win our battle. I wrote about our experience - it was early on in our journey and looking back on it, very valuable to our development and understanding around design thinking. We didn't end up printing anything but what the students created was fantastic. They showed their competence with respect to Google Apps for Education (GAFE - particularly Drawing), which has proven to be a solid foundation for the 3D work we are doing today.

Even though its only been 4 months, it seems as though we have been at this for a lot longer. As I said above, Google Apps for Education has helped us build a solid competence from a technological and design standpoint. I saw this capacity grow in previous years with my grade 2 classes and that is where the idea of using 3D technology came to me. The evolution I envisioned is coming to fruition which excites me for the future. I look forward to continued sharing in the coming months as we learn new things and allow our imagination to run wild to bring ideas to life.

Thursday, December 24, 2015

Merry 3D Christmas!

With Christmas just hours away, I wanted to share our most recent 3D design experiment. At the start of December, the students thought it would be a good idea to stretch our thinking and engage in one last big idea before the end of 2015. 

After some discussion, we decided that we would create our own Christmas ornament - an fun artifact to celebrate Christmas and a great way to end 2015. It was also noted that this artifact would be one that we would revisit year after year - each time we put up and decorated our Christmas trees.

Our learning has provided us with some insight on best practices when it comes to designing and printing objects. Students engaged in discussion about the shapes we might consider, designing it 'big' and then shrinking it to a reasonable size when it's time to print, and they also talked about marking the date on it and whether to include the date by excluding it (cutting holes) vs including it (making it stand out) in the design. 

Ultimately, whatever was to be created in the end had to be easily 'mass' produced so that each student could have one to put in their tree. 

After designing a couple of options, one of the students discovered a tree shape that was available to us in Tinkercad.  The class agreed to go with the tree shape in the app. This saved us a lot of time because all that was left to do was deal with the date and dimensions of the ornament.

Once we made a final decision, it was time to print! Our first version had an issue with the hole at the top of the tree that would hold a ribbon or metal hook that would allow it to hang on the tree. We took a bit of time to move the hole and make it a bit smaller. Here is what our final version looked like:


The ornament is not very thick, but thick enough to make it sturdy and can be printed in about 30 minutes.

We really enjoyed working on this activity. The students thought like designers and considered their knowledge/experience with the software and hardware. They used their understanding of measurement and mapping skills to make final decisions about length, height, thickness, etc. 

I'm so proud of how far they have come and look forward to what they do in the new year.

Wishing you a Merry 3D Christmas and a happy New Year!


Monday, November 30, 2015

We Started Coding Today!

The topic of coding/programming is not a new one to me, I just hadn't felt the need to introduce it to my students until recently. Several of my students have expressed an interest and I think a combination of things/people finally got me to take the first step. I short while ago +Michelle Booth posted about The Hour of Code initiative coming up Dec 7 - 13.


Last week, during our tech time on the computers in the library, the students noticed that I was exploring The Hour of Code website. I was actually coding some Minecraft games and once they realized what I was doing, they were all over me!! They were very interested, they love Minecraft. All of a sudden I had students take over the controls until I regained the mouse and sent them back to their work stations with the promise that I would provide them with more information about what I was doing and what I would be planning for them.

A couple of days later I informed my students that we would be participating in The Hour of Code this year. Also, thanks to the website, I was able to connect with two University of Waterloo students who would be speaking to my students about coding/programming. One of the volunteers will be visiting us in class and the other will be joining us via Google Hangout.

So, why code? What's the big deal? First off, my students are interested. They have been talking to me about it for a while now. The group that I have this year are keen with respect to solving problems and being creative. Coding allows students to be creative, collaborative, problem solve, learn a new language, think logically, and have a lot of fun!! Being able to code/program is the way of the future - it will become common place so to start their journey now is appropriate.

We are only in the introductory phase, and like anything worth doing, we need time to play and experiment. All of this is new to us and we are taking the time to get used to things and gain some useful skills. Once we have a handle on what we are doing, I can begin to make solid connections to our curriculum and immerse the students in activities that will hold their interest and allow them to acquire the knowledge, understanding, and skills that will lead them to academic success.

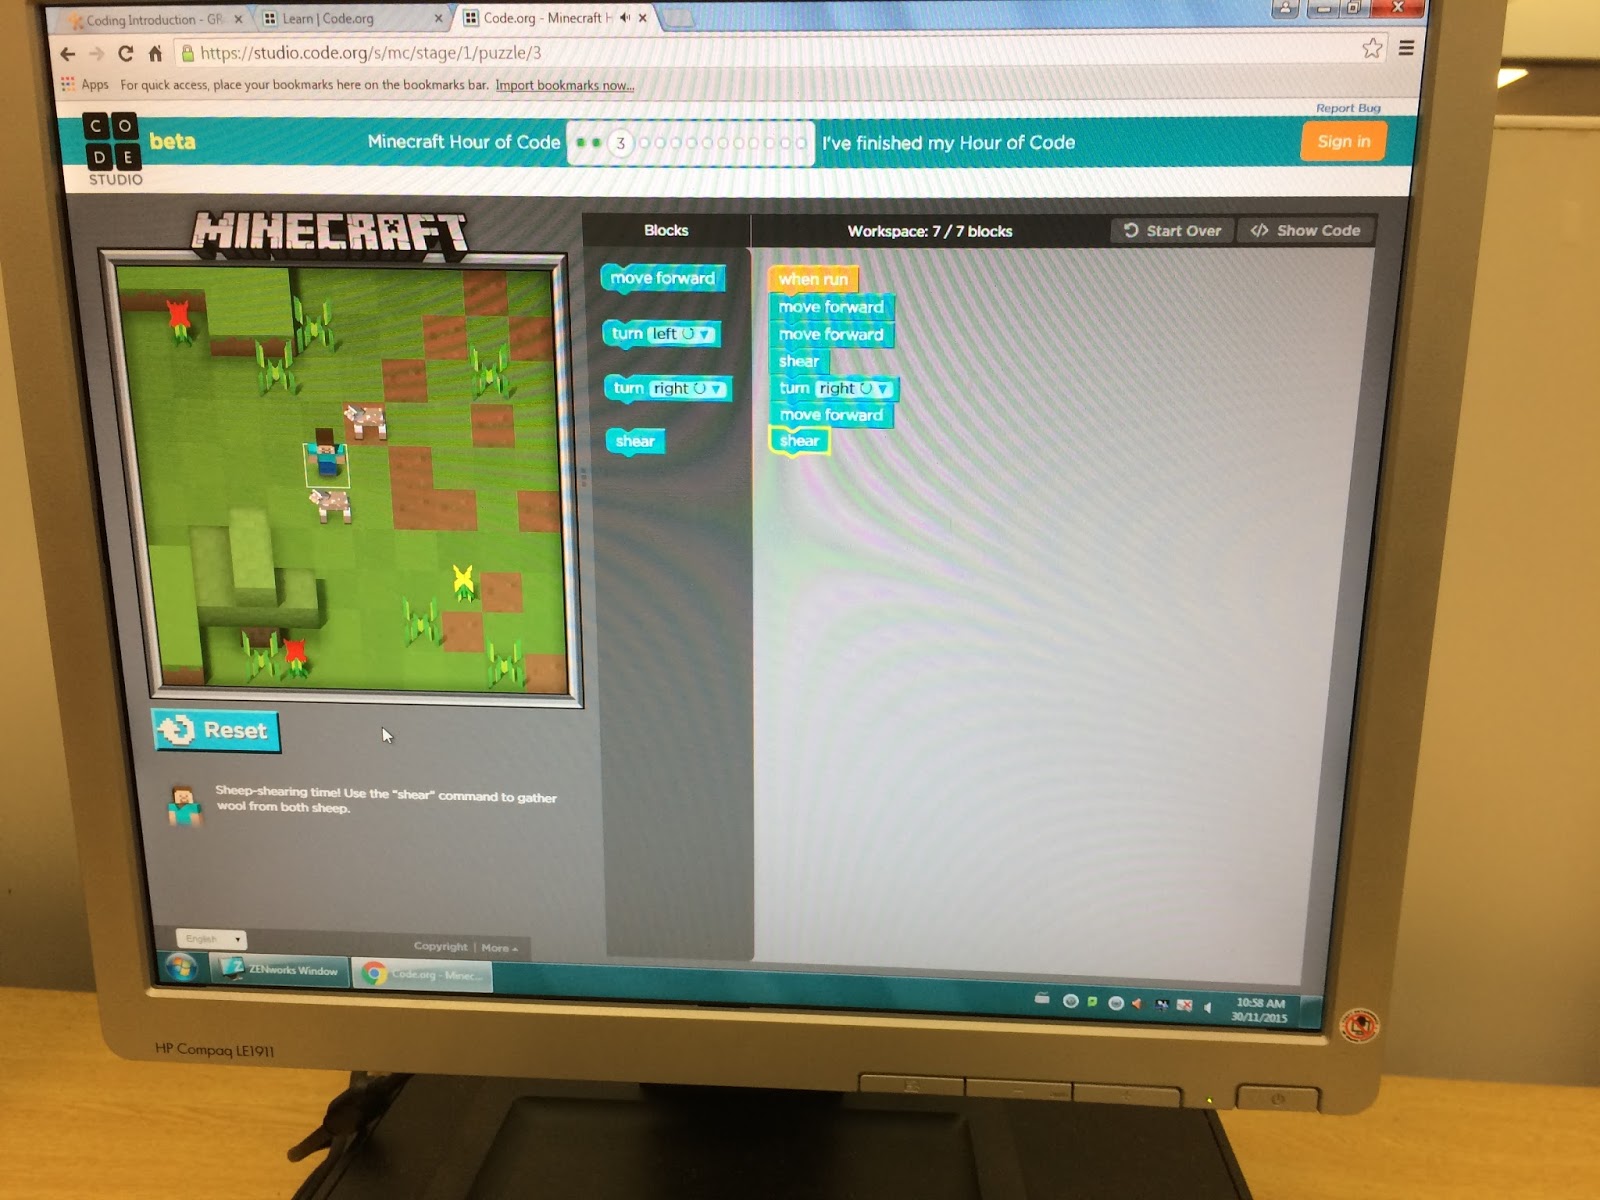
We started playing today. I introduced my students to a few options that involved Star Wars, Minecraft, and Frozen. Using blocks of code/demands, they went on adventures and did some cool things that they weren't able to do before.

When the students started working on their chosen activity, I saw some really amazing things. First and foremost, they each had a computer to start their activities. But as time went on, I saw students start to

  • work together to solve problems,
  • grab pencils and papers to write out their ideas and logic - essentially leaving the computer to code without it,


  • actually stand up and physically act out what they were going to do with their code
It was incredible. Actually, what was incredible is that they took the initiative to do what they needed to do to get the job done. All our talks about taking initiative, about being aware that there are a variety of ways to meet a goal, that it is ok to do things differently to get results, seemed to pay off. No one asked me to get pencil and paper, no one asked if they could problem solve with another student, no one asked if they could get up and move around! They had their task and they showed me that they could work on it in a way that would best suit their needs. This is precisely the culture that we are trying to grow in our classroom community and it was quite the reward for me to witness it.

Here are some photos of their work today:


I have a feeling that what we started today is going to lead to many fun and challenging learning experiences. Thank you to +Michelle Booth+Brian Aspinall+Sam Patterson Ed.D., +Jonathan So, and +Andrew Campbell for getting me thinking about coding and a special shout out to my Grade 4 students for nudging me to continue to meet their needs and interests.


Saturday, November 7, 2015

Mathematics and our 3D Artifacts

In Mathematics the students are adding and subtracting 3 and 4 digit numbers. They are engaged in a variety opportunities to gain knowledge, problem solve, apply their skills, and communicate their understanding, or lack thereof. They are talking, drawing, and using manipulatives as they work through problems. Sometimes they work with others and sometimes they work on their own. As I move around the room I listen to what the kids are saying, watch them work, and ask them questions about their ideas and the processes they are following to solve problems/complete a task. They seemed to be on the right track so I decided to add another layer to their learning.

I put the students into groups and explained that they would need choose a 4 digit number, create a representation of it using Tinkercad (3D software), print it, and then present it to the class. Based on my observations and discussions with the students, this seemed like the perfect time and task to integrate the 3D technology in a way that would allow them to use a design mindset to apply their knowledge and skills to create physical artifacts of their learning - to bring their thoughts and ideas to life. This task would also allow them to be collaborative and creative in order to complete the assignment.

I created the groups strategically. Each group had the following:
  • a natural/compassionate leader
  • someone skilled at using Tincercad
  • a student unsure of what to do
  • confident/competent student with the "Math"
I also let the students know that I would be moving people around if I felt that they had been placed in a group that wasn't working for them. There was a bit of grumbling, but once they got started things seemed to be going smoothly. Once or two group changes were made (personality conflicts) and then things were really underway. Each group had a Chromebook to access Tincercad and as usual they were free to work anywhere they wanted to within the classroom. 

While the students were working I was moving from group to group - listening to them and watching them go through the process of expressing their ideas (discussion, 2D drawings), representing them (using the software to take 2D drawings into 3D drawings), and then creating them (3D printing their representations). I was also listening for references to what they were learning in our current unit of study, past unit, and future units. From my perspective, I got to see and hear the four areas of achievement in such a natural way. The students were providing me with great data about what they know and what they can do as they engaged in this activity. 

The students were given two "Math" periods to collaborate and create and then we printed their work. 

Here are some photos of them working through the process:


Here are some screen shots of their work in Tinkercad:


Here are some photos of their 3D printed representations:


When the time came to present their work, the students were very excited to share what they had done. They talked about what worked, what didn't work, and how they dealt with design problems. They talked about their experience using Tinkercad and about new ideas that have come from this experience. EVERYONE in the group spoke and had something to offer. They even made sure to let me know who they might want to work with next time and who would like to lead :)

This was their first time they went through the entire design mindset process - from beginning to end. They have a lot of experience using the Chromebook and a significant amount using Tinkercad but this was the first time they printed their work. Having printed their work and actually held a product of their thinking in their hands, they now have some insight into how the printer puts together their design and what they might do differently now that they know how the printer does its job. 

This experience has provided my students and I with a new and exciting layer to our learning journey. We could feel a shift, an evolution, as we worked through the task that was given to them. They have a taste of the amplification that this type of thinking and technology can provide their thoughts and ideas. We are looking forward to what comes next and I can't wait until the next time I share our experiences with you.

I would love to hear about your thoughts and ideas about our experience. Please feel free to leave a comment below, and/or connect with me on Twitter or Google +.